Saturday, August 22, 2009

Home-made Sun Jar

A solar-powered LED lighted cookie jar reminiscent of the Sun Jar designed by Tobias Wong.

"Jam jars store jam, the Sun jar collects and stores sunshine so that you can use it at night."
Pass around the sunshine, Sunshine. (_)v

Components:
1. Ikea glass jar (AUD$3.00)
2. Solar garden light (AUD$10.00)
3. rechargeable battery (AA size)
4. Blu-tack
5. Tracing paper

Tools:
1. screwdriver
2. Utility Knife
3. Glass Frosting spray
CIMG0009.JPG
loading...
560x420 : F4KR1V7VS4EUR4U6HE (0)
i
CIMG0009.JPGCIMG0010.JPGCIMG0001.JPG

step 1Bringing them together

Step A:
Rip open the innards of the solar garden light. I know that may sound ambiguous but you'd be able to use a utility knife and surgically dissect the relevent components out (see image). Solar garden lights are easily available at your local major hardware store. If you're in Australia, try Dick Smith Powerhouse.

Step B:
Flip open the ikea jar and place the "solar garden light innards" as shown in the picture. Use blu-tack to keep it all together. Feel free to play around with the placements so the components would fit snuggly into the jar.

Step C:
Cut a strip of tracing paper and place it in the glass jar.
OR
Use a Glass Frosting spray .

Step D:
Close the lid of the glass jar with tender care and you're done.

step 2Charging and Usage

1.The light sensing diode on top of the jar should cause the LED to light up once ambient light diminishes below a certain threshold.

2.Keep the jar by a window with strong sunlight to charge the rechargeable batteries via the solar panel.

3. Enjoy your home-made sun jar or give it away as a cool gift.
CIMG0084.JPG
loading...
debug...
CIMG0084.JPGCIMG0009.JPG


Home Made Solar Water Distiller


A few years ago a storm flooded the local water treatment facility leaving me and all my neighbors without water for several weeks. Partially motivated by this I designed a portable solar powered water distiller. The idea is that a person adds water from any source (assumed to be dirty, salty or otherwise unfit for drinking) in one side and over the course of the day gets clean safe drinking water out the other side.

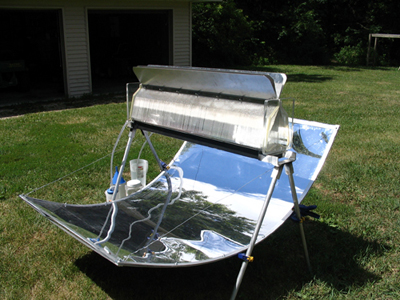
At the heart of this design is an innovative method for forming a medium size parabolic mirror using a flexible aluminized mylar sheet (the shiny metallic foil commonly used to make potato chip bags/decorative balloons). I built an aluminum frame, using 1 inch wide by 1/8 inch thick strips, that runs around the edge of the mirror and use a pair of wires at either end to draw the frame up into a parabola. The mirror is actually sandwiched between an upper frame and a lower frame. This mylar sheet, frame and wire construction makes a good parabola, is inexpensive, lightweight, and can be easily assembled/disassembled.

The aluminum frame is much stronger than necessary (& more expensive) and could easily be made out of a cheap local material like wood or plastic. The function of the frame is to 1) hold/capture the mylar sheet, and 2) provide some stiffness so the wire stays taught. The wire length determines how steep or shallow the parabola is, which in turn determines how close/far the focus of the mirror is from the mirror surface. The mirror is cheap (a few dollars) and ideally the frame should only cost a few more, altogether I’d guess it should cost under $10 to make the mirrors in any serious volume (maybe $10-$15 in moderate volume). I say should, because I’m still working with a prototype, and a custom job costs at least 10 times what I think the cost should be… Still I imagine a big cheap mirror can be useful in any number of solar applications besides water purification.

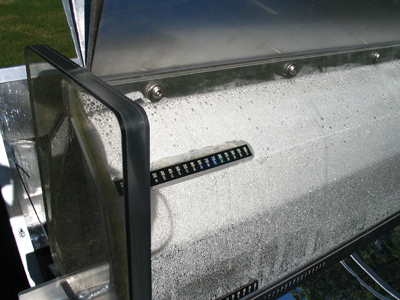
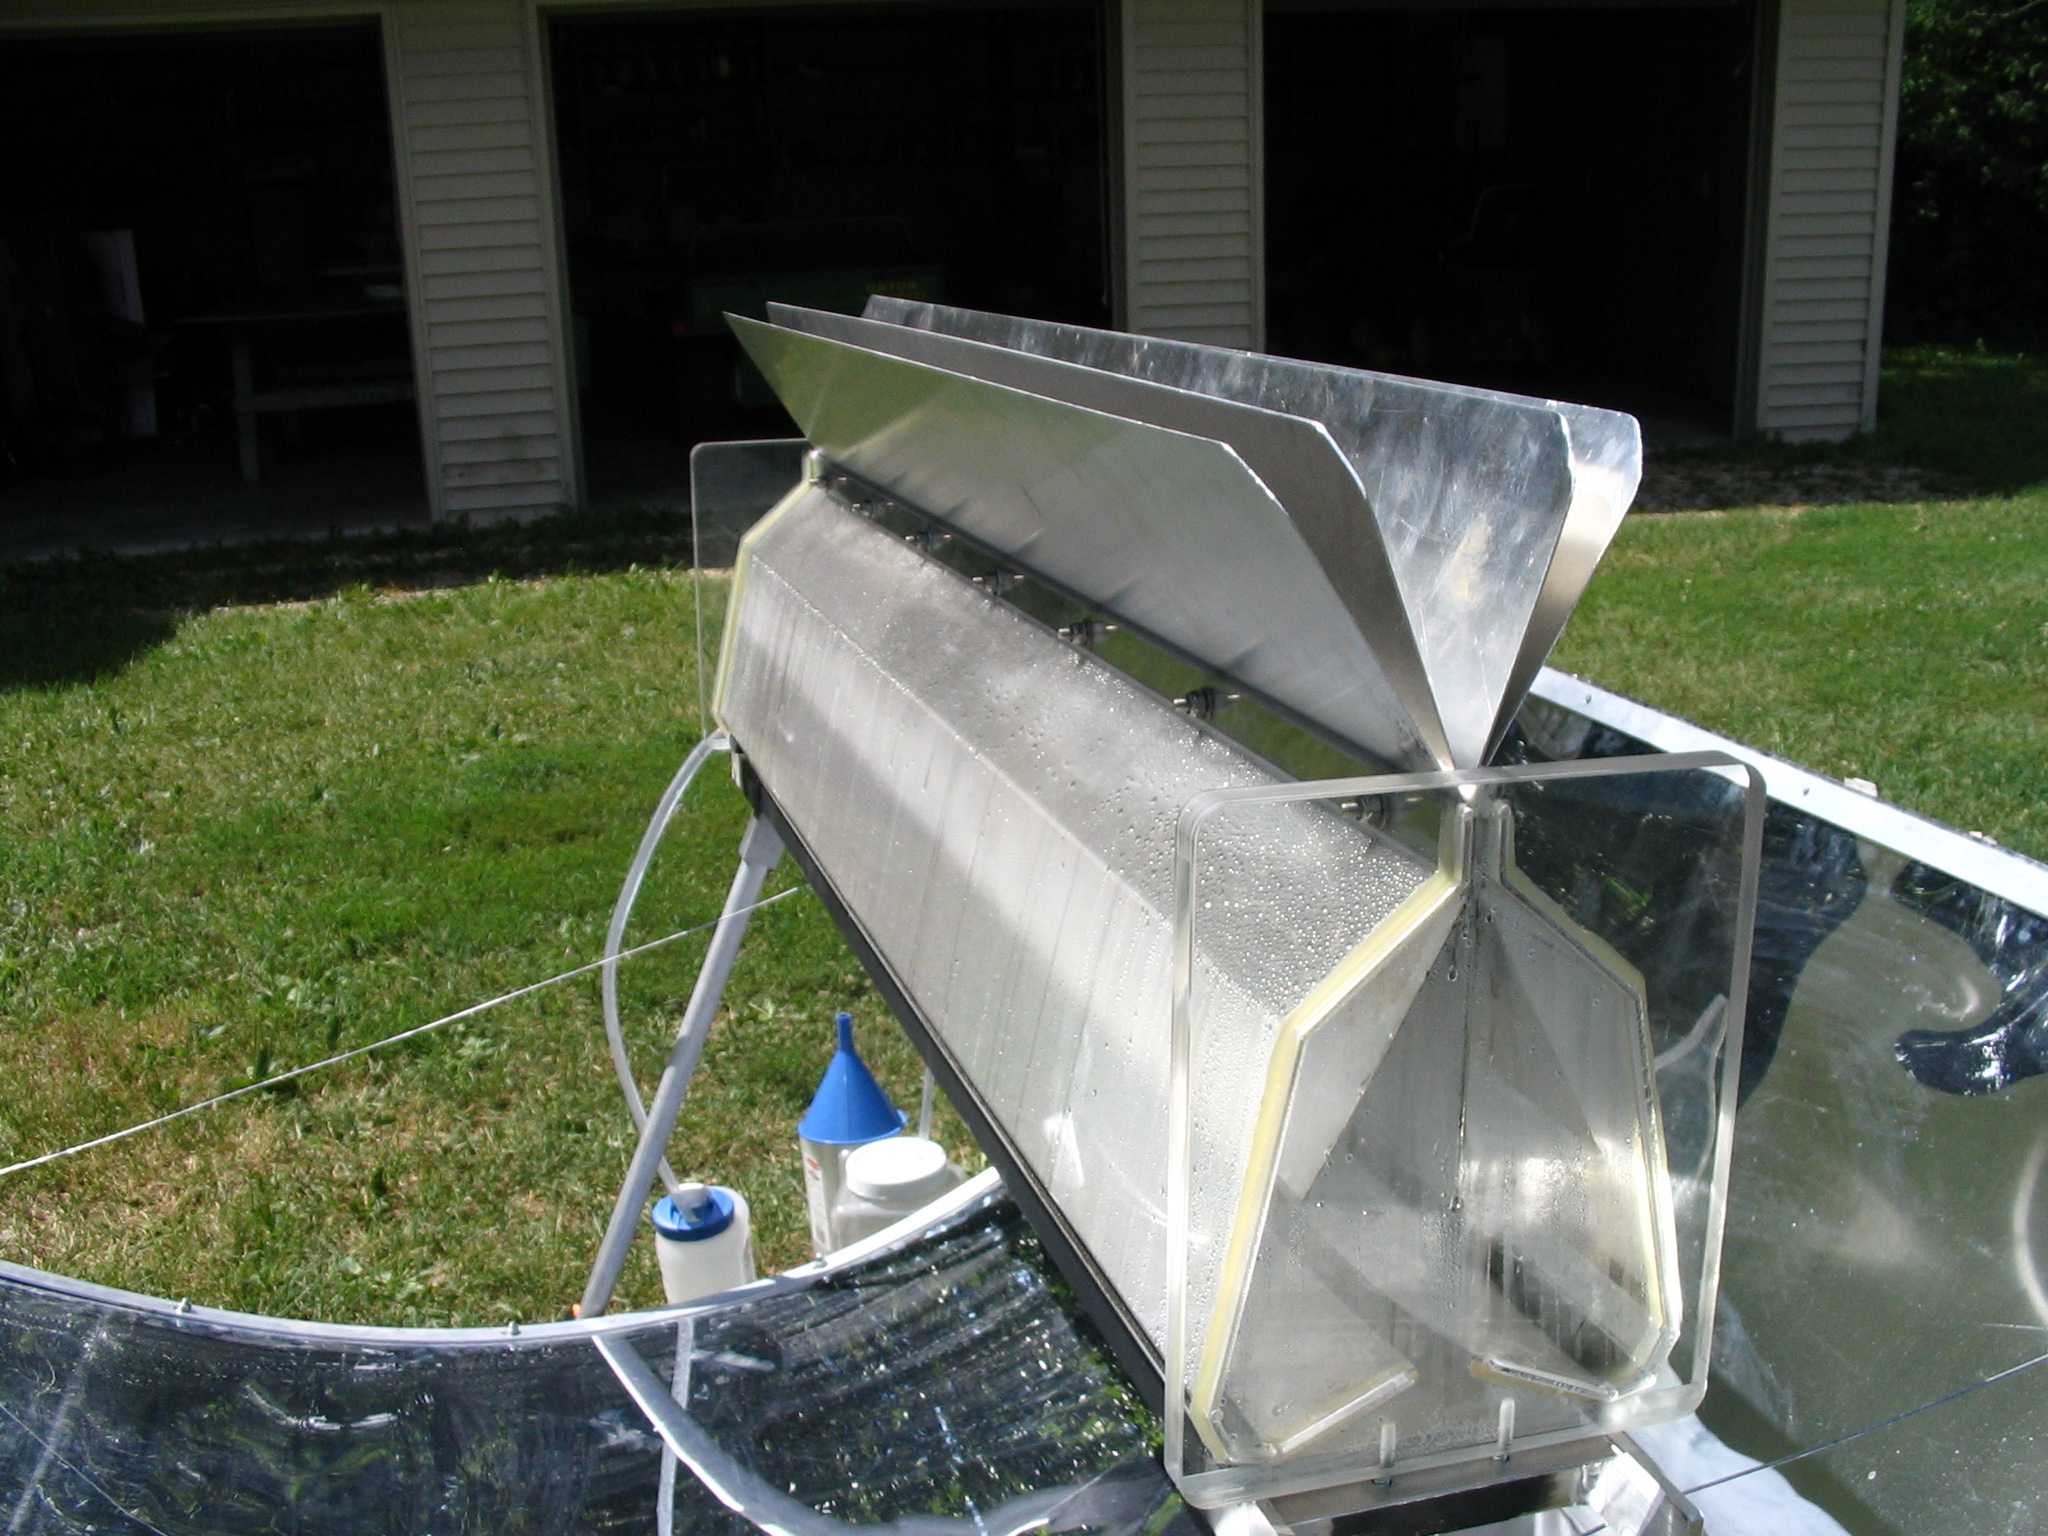
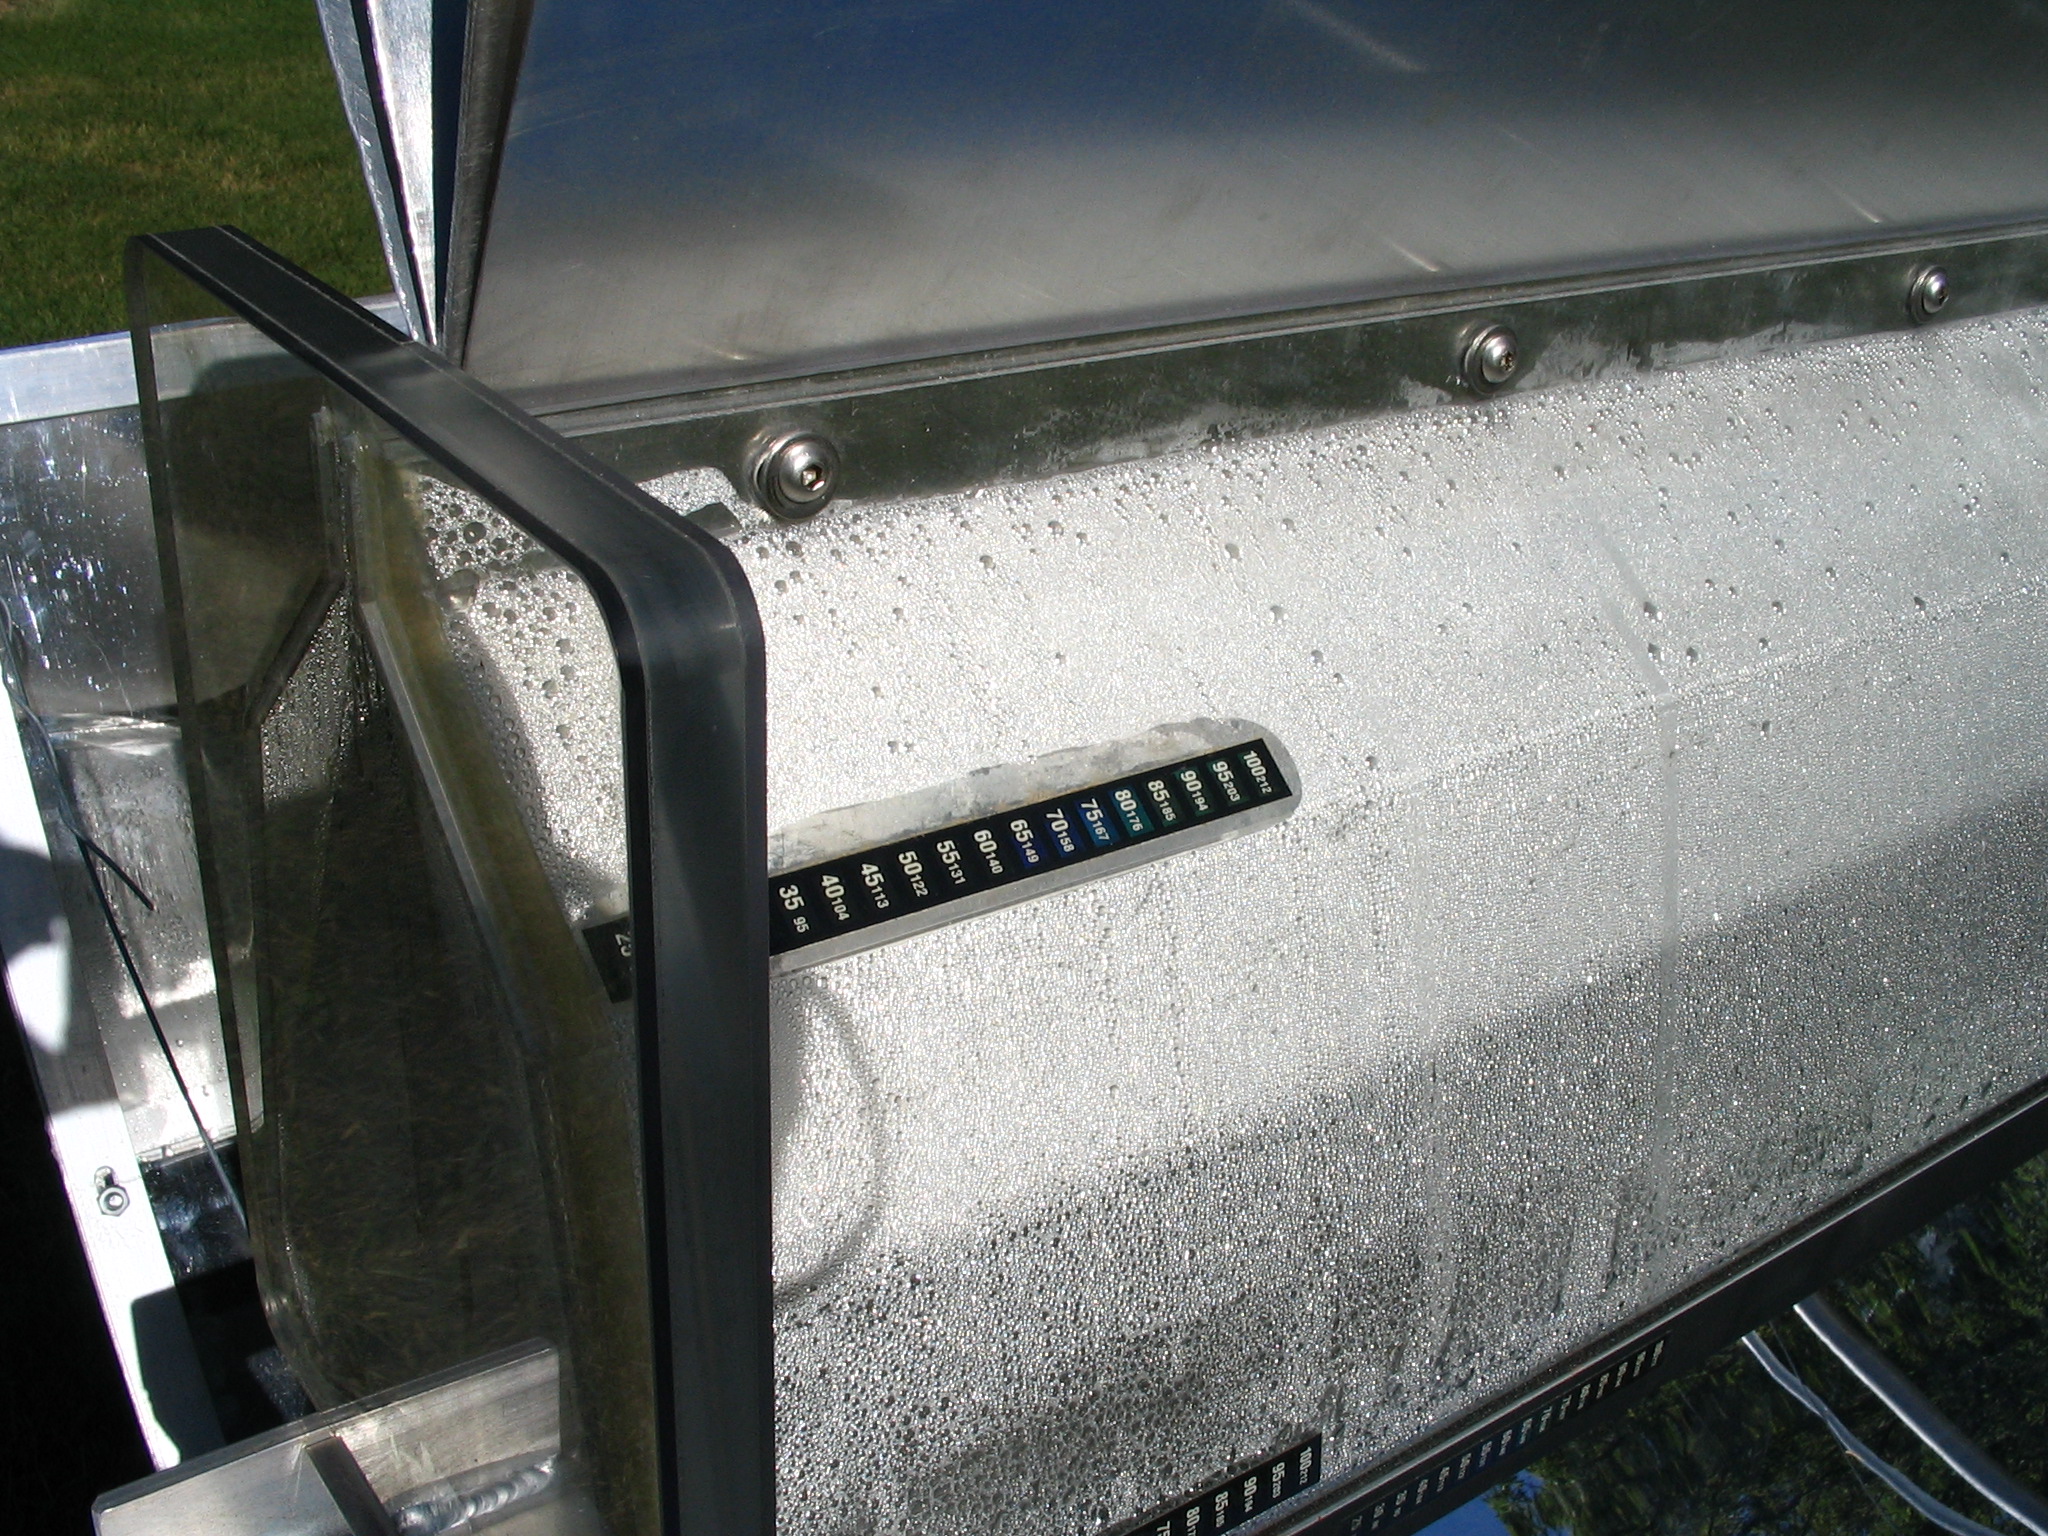
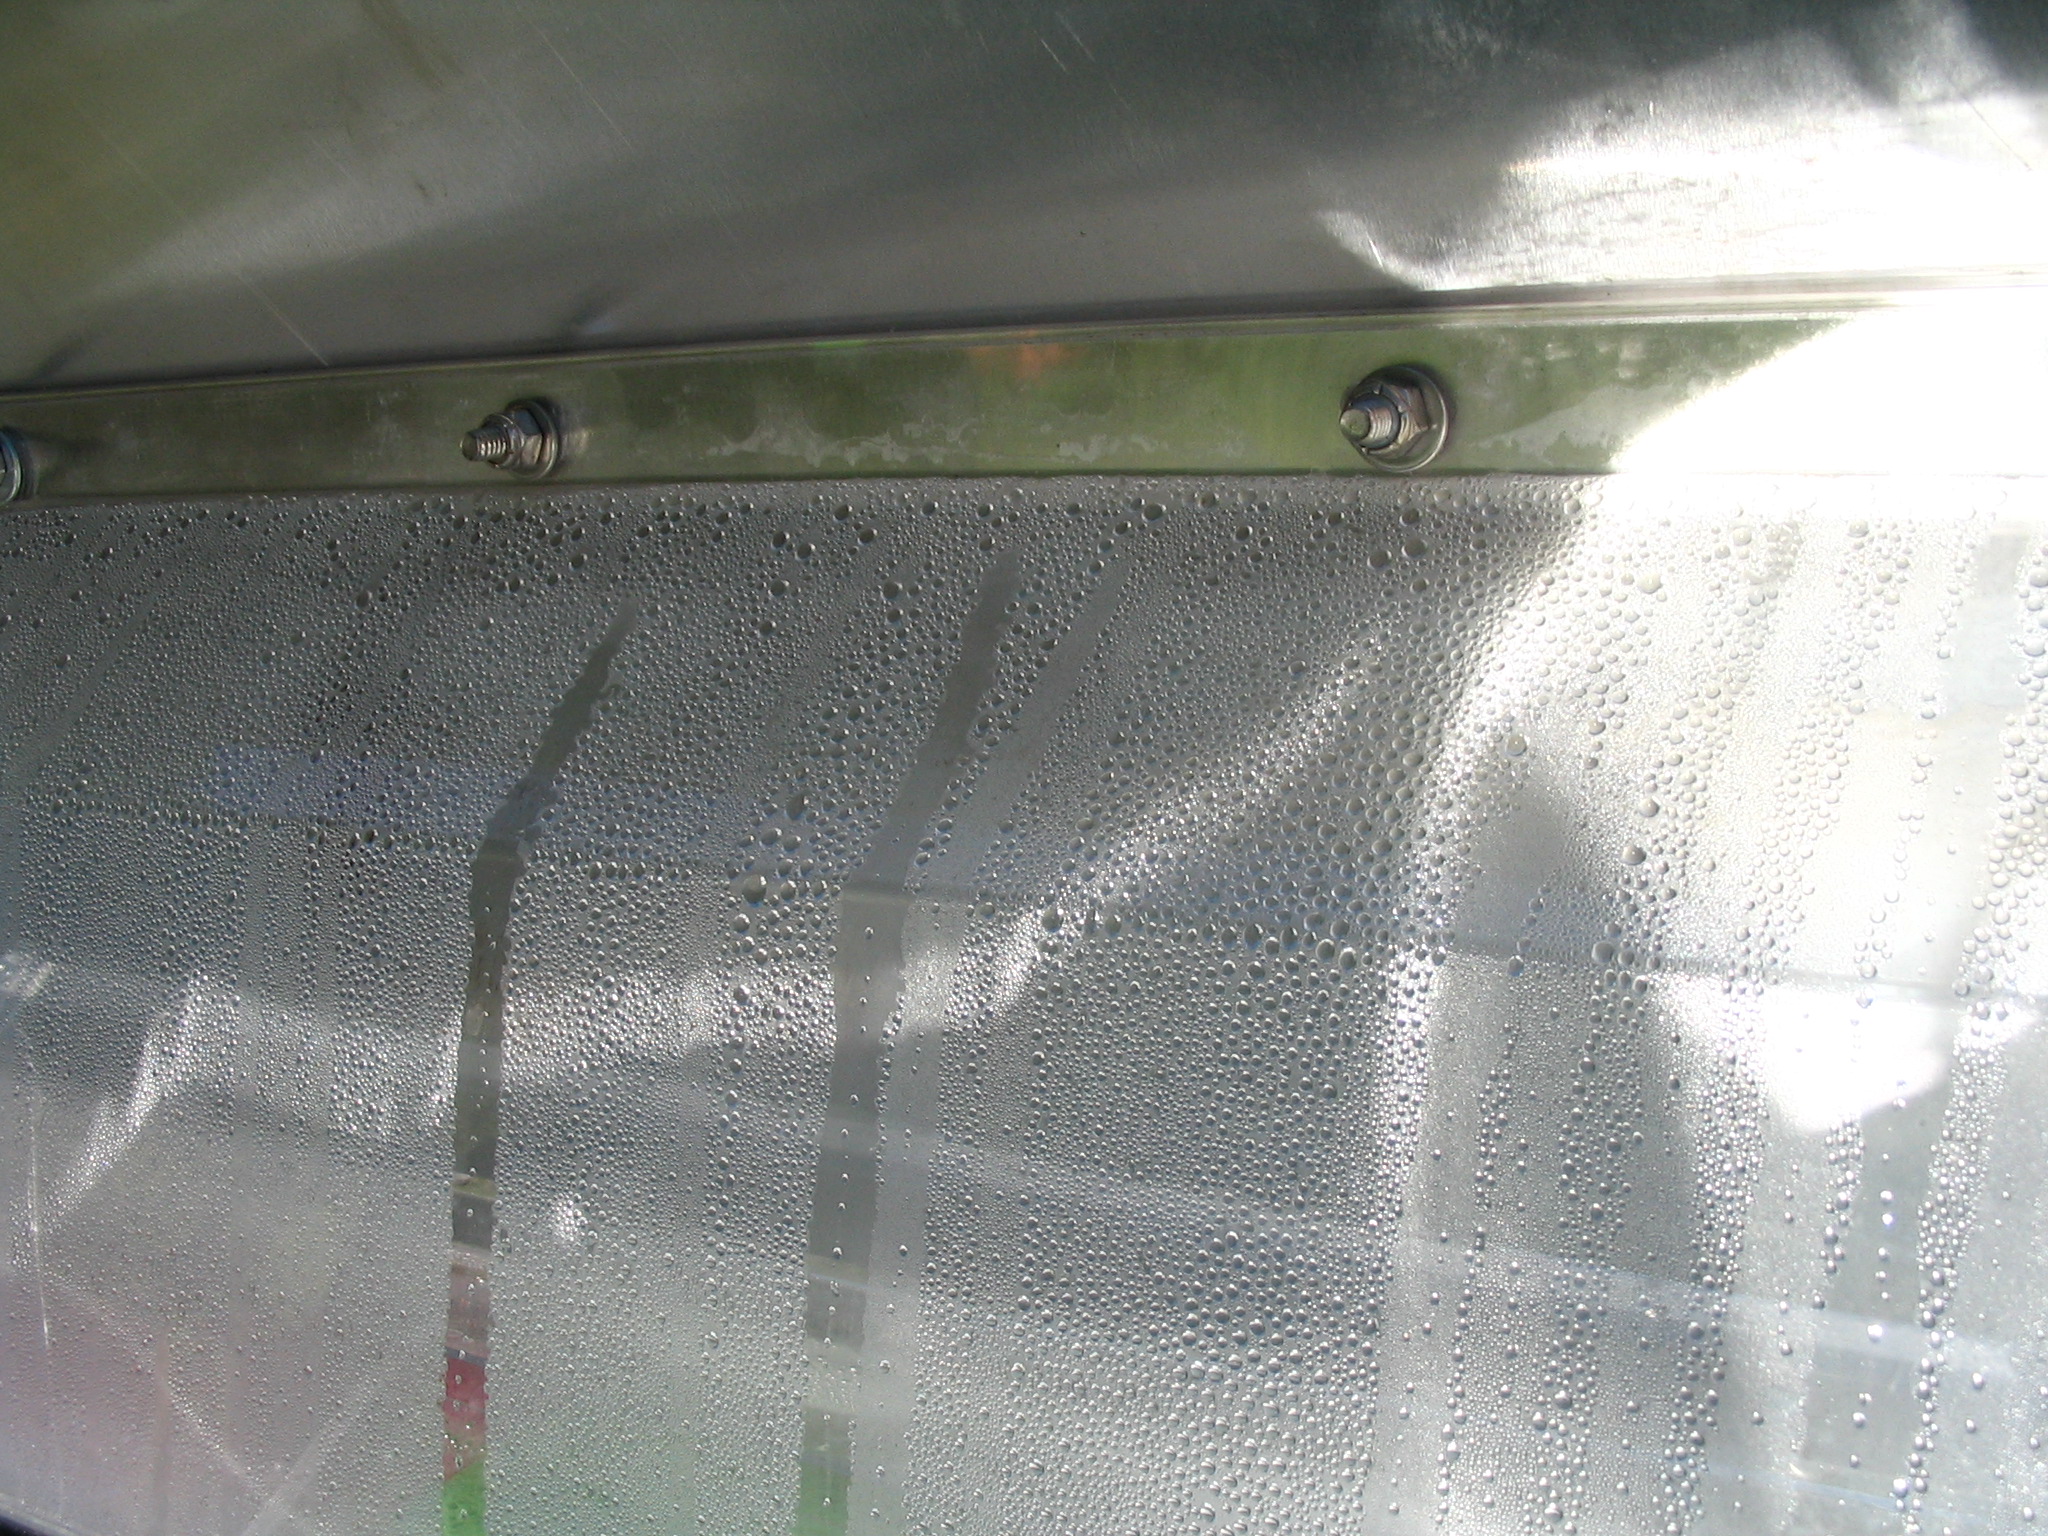
The mirror is placed under an evaporation chamber where the water is purified. The evaporation chamber has an aluminum pan (painted black to absorb the sunlight/heat) into which I add a trickle of ‘dirty’ water which is heated until it evaporates. This pan has a clear plastic cover which captures and condenses the water vapor as well as an interior lip that channels this pure/condensed water out of the distiller. The two piece evaporation chamber can be taken apart for cleaning or storage. At the moment the parabolic mirror needs to be adjusted by hand each hour to keep the sunlight focused on the pan, although this ‘tracking’ could be automated fairly simply by adding a small motor.

In the interest of keeping the device portable, I’ve only used a 2 square meter mirror which distills ~ 1 gallon of water/day. I’m working to boost the treated volume by a factor of two with additional design improvements—in theory a mirror this size could distill 4 gallons/day. I could also increase the distilled water production volume by using a larger mirror, doubling the mirror would double the production, although it would be that much harder to transport. The device weighs about 40 lbs, and the mirror can be rolled up like a poster.

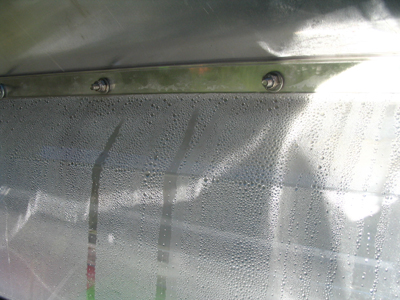
In fact my big problem at this time is that I’m collecting too much sunlight/heat onto the pan and the plastic cover gets so hot (60-70 degrees C) that the water vapor doesn’t condense as well as it should. The little metal fins at the top of the distiller are designed to help remove heat from the condensing cover. For scale, the mirror is 6 ft. x 4 ft. and the evaporation chamber is roughly 3 feet off the ground.

This is a fairly simple device. I’ve spent a few years working and improving the design almost entirely on my own. Last year I filed for a US patent on it, so the design is officially patent pending. I’d be delighted if some person or group found a situation in a developing/island country where this distiller would be useful (and I’d be happy to help in any way I can—adapting the design for local construction with local materials etc.), but I don’t want some major US corporation copying the idea, filing for a patent and potentially preventing me from using my invention!

Homemade Oreos

I know, I know, I’m afraid for my eternal salvation too. You just shouldn’t go around saying blasphemous things, however cool you think you want to be.

But, it’s true. I cannot deny that I have found something even better than Duncan Hines bulk brownie mix: Homemade Oreos.

And, voila! Heaven isn’t too far away. I’m closer to it everyday. No matter what your friends . . . Well. Give them a try, and you will be a true convert too.

I made these to eat while doing my taxes, and now I have a scientific explanation for why I always feel entitled to some serious snacks or and a caffeinated fountain drink when I have to do something taxing (haha).

But willpower, like a muscle, can grow when used consistently. “People who stick to an exercise program for two months report reducing their impulsive spending, junk food intake . . . They also study more, watch less television and do more housework.”

More reasons to exercise regularly. Sigh. In the meantime, pass me some more cookies: I’m focusing all my willpower on this one thing until my refund comes through.

Homemade Oreos

Chocolate Cookies

1 1/4 cups unsweetened cocoa powder
1 3/4 cups all-purpose flour
2 tsp baking soda

Whisk together. In separate bowl, whisk together:

1 cup butter (If you use unsalted (why?) add 1/8 tsp salt)
1 cup white sugar
3/4 cup packed brown sugar
2 eggs

Combine. Drop small cookies onto greased cookie sheet and bake for 8-10 minutes at 350. Move to wire rack after they’ve cooled.

Whipped Cream Cream Cheese Frosting

1 1/2 cups heavy whipping cream

Whip until quite stiff (but not quite butter-like). In separate bowl, beat:

1 (8 ounce) pkg cream cheese (I use Neufchatel, because I am extremely calorie-conscious)
1 cup white sugar
1/8 tsp salt
1 tsp vanilla

Fold whipped cream into cream cheese mixture. If too soft, refrigerate for a bit (and next time whip the cream more before folding, and don’t over-fold). Assemble cookies, or just scoop a large dollop of frosting onto a cookie en route to your mouth.

How to Plan a Carnival Birthday Party

Merry-Go-Round Cake
Merry-Go-Round Cake

A carnival birthday party is fun and exciting for the kids. You can create a memorable event for your child's birthday party by using many home-made things and purchasing a few inexpensive prizes and decorations. I'll show you how.

Things You'll Need:

  • Planning in advance
  • Make use of things you already have at home as much as possible.
  • Games
  • Prizes
  • Contests
  • Carnival Music
  1. Step 1

    There are many things you can do to create a fun carnival birthday party for your child. Many ideas are listed below. Gear the activities towards their ages. If they are young, let all children play the way they want to and give out prizes to everyone. You can hand out 10 tickets and a bag (to collect their prizes in) to each child as they arrive. Tell everyone that each game costs 1 ticket. Instructe them to put their ticket in the box themselves, play the game, return the balls or whatever they tossed back to the starting point, and pick out a prize at each station. Have some adults helping out for some of the games.

  2. Step 2
    Rainbow Arch
    Rainbow Arch

    Make a rainbow arch grand entrance. Use helium balloons tied on a string or ribbon and anchor each end with a heavy weight. This is easy to at home do if you buy one of those helium tanks at the store.

  3. Step 3
    Ticket Booth
    Ticket Booth

    Create a ticket booth. Use poles, large thick paper, or cardboard and make a ticket booth any way you want. You can even make one out of a large cardboard box. Use paint or markers to decorate the booth.

  4. Step 4

    Play some circus or carnival music. You can find music like "Thunder and Blazes" on iTunes. Play it when the kids arrive is a great into to the carnival theme.

  5. Step 5

    Create a balloon darts game if you have older kids at the party. Just keep track of those darts so nobody gets hurt and put them away when the game is over. Make sure noone is in the path of the darts when they are being thrown. Use a large board and tack blown up balloons on it. Then, one at a time, give a child three darts to pop the balloons with.

  6. Step 6
    Ring Toss
    Ring Toss

    Make a home-made ring toss game. You can make one from an old wooden coat rack or from some of those empty DVD or CD spindle holders. You can be creative and make it with whatever you can find at home.

  7. Step 7
    Roller Ball
    Roller Ball

    Make a home-made roller ball game. Put a set of muffin tins inside a cardboard box. Place muffin paper cups in the tin and mark each with a number. Create a ramp out of a box (or whatever you have) and prop it up at an angle. Provide a set of small balls to roll into the muffin tin.

  8. Step 8
    Frog Jumping Game
    Frog Jumping Game

    Create a frog jumping game by using a large cardboard box with low sides. Paint the bottom blue for water and place small green paper plates on it for lily pads. Purchase some little toy frogs and let the kids toss the frog into the pond to see if the frog will land on a lily pad.

  9. Step 9
    Bean Bag Toss
    Bean Bag Toss

    Create your own beanbag toss game by using a large sheet of foam board. Decorate it however you want and cut some circles out, large enough for the bean bags to get through. Support your board somehow. You could make your board stand up by taping a hula poop to the top of the back and stretching it out like a ladder. You can purchase some bean bags or make your own from fabric and dried beans.

  10. Step 10

    Hold a few contests such as a paper airplane flying contest, or a gummy worm hunt contest. The kids will enjoy the gummy worm hunt contest. Each kid gets a plate with three gummy worms covered in whipped cream, and a cup. The kids find the gummy worms with their mouths and tongue and put them in the cup as fast as they can without using their hands. Napkins are a must for this activity.

  11. Step 11
    Merry-Go-Round Cake
    Merry-Go-Round Cake

    What party would be complete without a cake? Make a merry-go-round cake with chocolate horses and straight candy cane sticks. The top of the carousel can be a paper circle.

  12. Step 12

    You don't need to spend a lot of money for this party. You can make many of the games from things you have home. Low cost carnival prize toys can be found found at www.smalltoys.com. You can search by price, the lowest cost items range from .01 to .10 cents each. They have many price levels and some unique toys too.


Tips & Warnings
  • Plan ahead for a party like this.
  • Use materials you already have at home.
  • Get your children involved in preparing some of the games. It's a great opportunity for some quality time with the kids.

Aquatic Pod-Racer made from scratch with recycled materials

homemade-jetboat.jpg

While it's significantly more difficult than buying a commercial boat, one of the beautiful things about building your own is that you can pick what it's made from. In the case of this "Aquatic Pod-Racer," Joey Ruiter used three months and $20,000 to cobble it together all from recycled matariels. The forward pontoons each have a 215 horsepower jet-ski engine inside and, with no external propeller, the boat can skim along in only five inches of water. He made it to zip around where conventional boats have trouble and the craft's agile pontoons allow enable it to pull of hair-pin turns.


Thank You

Thanks for visiting my blog.Now kindly thanks the publisher by clicking any (ads) available in the blog.You can use My Google Search Engine as your default search engine.Add Comments to my blog posts and share it via different social networks. Mention the flaws left in posts and let me able to better my blog. Moreover,You can suggest me some related links to my blog posts.Bookmark it,soon you will need it again.I will be personally thankful to you.