1-1/2 cups flour
1/4 cup salt
1/4 tsp. cornstarch
2/3 cup boiling water
1 tbls. fragrance oil
Colorant of your choice
Mix all dry ingredients. Heat water in a Pyrex cup in the microwave or on the stove. Add the f/o and the color to the water. Stir water mixture into flour mixture. Mix as best you can and then knead the dough with your hands. At this point you just want it to look like pie ordough. Roll it out about a quarter of an inch thick. Cut into shapes or use cookie cutters. Another option is to stamp the flat shapes. Let the dough stones dry. They get hard as rocks and will last for months.
I have not tried this, but it looked easy to make, and would be cheaper than buying one. Most of the ingred. you would have, except for the fragrance oil. In my case I would have to buy some.
Showing posts with label Make Kids Happy. Show all posts
Showing posts with label Make Kids Happy. Show all posts
Tuesday, June 15, 2010
Homemade Fragrance Stones
Fragrance Stones

How to Generate Homemade Electricity the Easy Way
Many people nowadays want to learn how to generate homemade electricity. There is indeed a strong, sudden interest in this type of technology. Why is that? There are several answers to this question, but the most obvious ones are economical and environmental reasons.
The recent global economic meltdown has made millions of people reach deeper into their pockets to pay their soaring bills. On top of that, the prices of commodities, such as oil and natural gases, have also increased. This is due to the fact that demand for these products has increased while supply is steadily declining. Another point to consider in the sudden interest in clean and renewable energy is the worsening effects of global warming. The bulk of our energy is produced by power plants that feed on fossil fuel. These power plants are one of the main producers of carbon gases in our atmosphere. Unless we act now, our world will be subjected to abrupt climate changes and unpredictable weather.
How to generate homemade electricity is very easy and cheap to do. All you need is a good plan and some common sense. You can choose either solar or wind energy. It really depends on which type of source is bountiful in your area. You can choose to have both of them as well. The plans are not that difficult to find and the Internet is the best place to look for such guides. It is recommended to start with DIY solar kits or DIY wind turbine kits. These kits have instructions that are very easy to follow. They also have videos on how to proceed with the construction. They will also tell you what materials to use and where to find them. You will be surprised at how easy they are to locate. The tools and materials needed for the whole project can even be found at any local hardware store.
The great thing about learning how to generate homemade electricity is the benefits such project entails. Because you are producing your own electricity, you will no longer be burdened with bills. You are also helping the environment by not using electricity from dirty power plants. If you want to save money and the environment, then learn how to generate homemade electricity the easy way by purchasing DIY kits.
How to Make Your Own Homemade Wax
Instructions
Things You'll Need:
- 2 cups brown sugar
- 1/4 cup water
- 1/4 cup lemon juice
- and a clean pan
- Step 1

Mix sugar, warm water and fresh lemon juice (better if sieved) all together in a saucepan, and heat it over a low flame. Keep stirring the mixture to avoid it sticking on the pan or burning. I prefer using wooden spatula. Stir it until all the sugar has melted and caramelized, and you have a thick brown liquid ready.
- Step 2

Let it cool slightly before using it. It can be stored for a long time in a heat proof container for later use.
- Step 3

Make sure you store the prepared wax in refrigerator to be used later. Before you use it warm up the wax container in a microwave or you can also warm it up by placing the container in a deep pan filled with boiling water on stove on low heat.


Tips & Warnings
- If you are not going to be using the whole container of wax then it's always a good idea to heat only the amount you need in a separate container.
- Always warm up the wax on low heat. By doing so you'll prevent wax from burning.
- If you don't have brown sugar handy then you can also use white sugar.
- Lemon can be substituted with vinegar.
- It can get messy and the wax can get stuck to anything. Use newspaper or an old bed sheet on the surface where you are waxing.
- You can wipe clean the wax drippings with a damp cloth.
- Waxed area can be washed with cold water to soothe the redness.
- Use aloe-vera after waxing.
Homemade Facial Scrubs & Masks
Make a paste from a little oatmeal and water. Apply to face and allow to dry. Gently wipe off with a damp wash cloth.
Mash 1/2 banana and add 1 tablespoon honey and 2 tablespoons sour cream. Apply to face and let set for about 10 minutes. Gently wipe off with a damp wash cloth.
| Two tablespoons of cornmeal mixed with enough water to make a thick paste makes a great inexpensive facial mask. Gently apply to face and wash off.: In a food processor or blender, combine 1/2 cucumber, 1 tablespoon yogurt, a few strawberries, and 1 teaspoon honey. Apply to face and allow to dry. Gently wipe off with a damp wash cloth. Grind 1 tablespoon almonds into a fine meal in a blender or food processor. Mix almond meal together with 1 tablespoon honey and 1 egg white. Apply to face and let set for about 15 minutes. Gently wipe off with a damp wash cloth. To loosen blackheads, combine equal parts baking soda and water in your hand and rub gently on your skin for 2 to 3 minutes. Rinse with warm water. Mash half of an avocado and apply to entire face. Let set for about 20 minutes and then gently wipe off with a damp wash cloth. Soak 1 cup dried apricots in water until softened. Puree in blender or food processor with 2 tablespoons skim milk powder. Apply to face and let set about 15 minutes. Gently wipe off with a damp wash cloth. | Puree 1/2 peeled, sliced cucumber in a blender or food processor and add 1 tablespoon yogurt. Apply to face and let set about 20 minutes. Gently wipe off with a damp wash cloth. Crush a handful of strawberries and mix well with 1 teaspoon honey. Apply to face and let set for about 15 minutes. Gently wipe off with a damp wash cloth. Mix 1 1/2 teaspoons honey, the juice from 1/2 of a lemon, and 1 small carton plain yogurt. Stir in 1 whipped egg white. Apply to face and let set about 15 minutes. Gently wipe off with a damp wash cloth. |
Homemade Facial Mask Recipes
- Cucumber Face Mask
Make a paste by mixing one small cucumber and one cup of oatmeal. Mix one teaspoon of this paste with one teaspoonof yogurt (for oily skin) or milk malai (for dry skin) and leave for 30 minutes and then rinse. - Turmeric Facial Mask
This is the traditional mask, also used for a bride, seven days in advance of marriage.
Take in a cup half a cup of besan (gram flour), 2 tsp of turmeric powder, 2 tsp of sandal wood powder, 2 tsp of ghee or almond oil, add some water to make a paste. Apply to face and whole body and leave for 5-10 minutes. Rub with pressure with both palms and fingers to remove all the paste. - Honey Facial Mask
Rinse your face with warm water to open up the pores. Apply honey and leave for half an hour. Rinse with warm water, then use cold water to close the pores. Rinse with warm water, then use cold water to close the pores. - Oily Skin Mask
Mix 1 tsp. brewer?s yeast with plain yogurt to make a thin mixture. Apply it thoroughly into all the oily areas and leave for 15 - 20 minutes. Rinse with warm water, then use cold water to close the pores. - Dry Skin Mask
Mix 1 tsp. of butter in 1 teaspoon of water. Apply it thoroughly into all the dry areas and leave for 15 - 20 minutes. Rinse with cold water, - Banana Mask for wrinkles
Mash 1/4 banana until very creamy and apply on face and leave for 15-20 minutes. Rinse with warm water, then use cold water to close the pores. - Avocado Facial Mask
Mash the meat of the avocado into a creamy texture. Apply it thoroughly on face and leave for 15 - 20 minutes. Rinse with warm water, then use cold water to close the pores. - Oatmeal Facial Mask
Take 2 tsp oatmeal and 1 tsp baking soda and add water to make paste. Apply to face and all over the skin and rub gently. - Facial Mask
Squeeze half a lemon and mix the juice with one beaten egg white. Apply on your face and leave for overnight. Wash your face with warm water. - Clay Facial
Choose the right clay for your skin type. Add plain water or floral waters or try wetting agents such as fruit purees . Make a thick paste of the clay. Apply the mask to your skin and let it dry for 20 minutes. Rinse well with warm water and pat dry. Repeat weekly. - Multani (Gypsum) Mitti Body Mask
Make a paste of multani mitti adding water to the mitti powder. Apply to whole body and hair. Take bath after half an hour. - Grape Cleanser
Split 2-3 grapes and rub the flesh over face and neck. Rinse with cool water. - Banana Face Pack for Dry Skin
Mash half cup of natural yogurt, 1 tablespoon of honey, and 1/4 ripe banana. Apply this pack on face and neck and leave for 10 minutes and then rinse off. - Cucumber Face Pack to get Smooth Skin
Mash 1 whole cucumber, strain water, add 1 tablespoon of sugar and mix well. Put in a container, keep refrigerated and take out whenever you want to use it. Apply on your face and leave for 10 minutes, then wash with cold water and enjoy the smoothness of your skin.
You can try it on other parts of body as a scrub.
Submitted by Erica,
rapmonkey1@yahoo.com.
Facial Masks for Skin Types
- Homemade Facial mask for normal skin
- Make a paste of some powdered with milk or lemon juice if you want to fade spots on your skin.
- Blend 1 egg white, 2 tsp vegetable oil and 1 tsp apple juice until smooth.
- Mix 1 egg white, 1/2 cup cooked instant oatmeal and 1 tsp olive oil until smooth.
- Apply a raw egg yolk and rinse with cold water. The high vitamin
A content of egg is very effective in healing blemishes.
- Mix well 2 parts milk, 1 part fuller's earth clay, 1 tsp honey and essential oil.
- Homemade Face mask for oily skin
- Blend 1/2 tsp lemon juice, 1 egg white, 1 tsp honey (heat in microwave for a few seconds to melt it), 2 strawberries and 2-3 drops eucalyptus oil or jojoba oil (optional).
- Blend a ripe tomato and pat on your face. Wash after 20 minutes with normal water.
- Mix well a tsp of baking yeast in a some warm milk.
- Make a paste by mixing some potato flour in tomato puree.
- Blend an apple in a blender and apply on your face. Wash after 20 minutes with normal water.
- Rub some Milk of Magnesia, and let dry, then rinse with lukewarm water.
- Homemade Facial mask for sensitive skin
Warm some hone to melt it, then apply. Leave the mask on for 20-25 minutes.
- Homemade Face mask for dry skin
- Mix ½ avocado (or 2 tsp avocado oil) with ¼ cup honey.
- Mix 1 egg yolk, 1 tsp olive oil and 1 tsp warm honey, some vitamin E oil (optional).
- Blend 50g ripe avocado flesh, 25g orange juice, 1tsp honey, 1 tsp molasses and 4-5 drops of some essential oil.
- Homemade Facial mask for combination skin
- Mix 1 egg white, 1/2 cup cooked instant oatmeal and 1 teaspoon olive oil until smooth.
- Rose Mask: This mask is good for both the oily and dry areas of your skin.
Take Soak 5 rose petals and soak in water and then crush them. Add 2 Tbsp rosewater, 1 Tbsp yogurt and 1 Tbsp honey (heat in a microwave for a few second to melt it) and mix well.
- Homemade Facial mask for ageing or maturing skin
Take 3 Tbsp sugar and dissolve it in 4 Tbsp warm water.
This mask is good for maturing skin and will help soften the wrinkle lines. - Face mask for chapped or sunburned skin
Mix 1 cup plain yogurt and ½ cup oatmeal and apply to the skin for 15 minutes. - Facial masks for all skin types
Grind a cup of yellow mustard seeds and a few rose petals in water. Apply on face and wash with water after 20 minutes.
Blend two egg yolks, two tablespoons of honey and 3 drops of almond oil. Apply on face and wash with water after 20 minutes.
Top 10 Homemade Facial Masks
When you search for the best homemade skin care, you will be overwhelmed with so many facial masks that contain all the materials present on planet earth. Almost all of them are good for your skin in general, but the questions you searched for like the specific recipe for a certain age or condition, the appropriate ingredients, the frequency of use are not answered leaving you confused even more than before you read. You have got the golden nuggets and you are asked to make your own jewels.
In this hub, you will read about the needs of the skin at different ages, and the optimal ingredients needed by the skin at different situations, consequently we will rank masks according to their utility, ease of use, and content.

The Best Ingredients For Your Skin
The skin is composed of many layers and tissues, and each of them needs certain requirements according to age.
The first requirement for all the cells and tissues is energy, and this is supplied by sugars in honey and fruits, and medium chain triglycerides present in milk and coconut oil.
Certain vitamins play an essential part in the health and integrity of the skin, like vitamin A which acts like a hormone on the skin cells , vitamin B complex which is necessary for all the metabolic processes when the cells are active, and vitamin E which acts - as far as we know- as anti-oxidant to guard against the harmful effects of oxidants.
An important component of cell membranes is Lecithin (phospholipid) present in Egg yolk and vegetable oils.
Fruit acids (alpha hydroxy acids) requirement appears with age, when the superficial layer of dead cells is required to be shed off more quickly, and this is done by fruit acids when they reduce the stickiness of the cement material that holds the dead keratinized cells on the surface of skin.
There are some phytochemicals (present in plants) that have specific effects on enzymes of the skin cells, and will be discussed separately.
You guessed it, the better masks for your skin are those that supply energy, vitamins, and membrane components, more than doing any thing else.

1- Heavy Cream Easy-To-Use Facial Mask
Ingredients :
• Heavy Cream ( Milk Cream )...................... 1 Tablespoon
• Honey ....................................................... 1 Tablespoon
• Baking Soda ............................................. 1 gram
Method : - Mix the baking soda with the cream until it acquires the consistency of men's shaving foam - Add honey and mix, smooth the skin of face and neck for 20 minutes
This is the quickest mask to prepare it has also the quickest effect, since it contains medium chain fatty acids in the free form, sugars, vitamins (specially vitamin A), minerals and trace elements. It will leave your skin very smooth.

Homemade Beauty Recipes
Honey Mask Recipe
The best facial mask is honey. Place a cloth in warm water and apply to your face to open the pores. Smear on honey, and leave on for 15 to 30 minutes. Rinse off with warm water, then use cold water to close the pores. Use once a week.
Miracle Whip Exfoliator
Here is how you apply this "miracle cream":
Make sure all your hair is pulled back from your face. Apply a thin layer of the KMW all over your face, up to the eyelashes and make sure to also put some on your neck. The "fumes" from the vinegar may bother you so walk around the house to try to escape them. LOL!
Leave on for 10 minutes, then massage gently. The dead skin cells on your face will roll off in rubbery little balls. Rinse your skin with tepid water, then cleanse as usual following your regular beauty regime. If you apply the KMW every day, in 6-8 weeks your skin should be completely renewed.
I cannot help but wonder if this Miracle Whip eats away at the dead skin cells on your face, what does it do to the inside of the body when someone eats it?? Pretty scary!!! One person believes that the vinegar in the Miracle Whip is what causes the exfoliation and rejuvenation. If that is true, why not try a mixture of organic apple cider vinegar with some olive oil, apply that and see what happens? One could whip together the olive oil and apple cider vinegar, apply it to their face and then use the leftovers on their salad!
I think I will start experimenting with some ingredients and try to come up with a facial recipe to rival the KRAFT MIRACLE WHIP!"
Special Note from Lucie (site owner):
"After reading Victoria's email about the Miracle Whip beauty trick (the above is an excerpt from that email), I bought a small jar of Miracle Whip. I applied a slighter thicker layer than was recommended and the vinegar smell was unpleasantly strong.
After a minute or two, the Miracle Whip 'melted' and my face was very shiny and oily (yuck!). After 10 minutes, I washed the Whip away and I couldn't believe the results. All the flaky dry skin was gone and my skin felt tight and smooth. Very strange!"
Remove Hair Build-up Recipe
1/4 cup vinegar
1 cup water
After conditioning the hair use this as a final rinse. Leaves your hair soft and shiny.
Hair Egg Conditioner Recipe
1 teaspoon baby oil
1 egg yolk
1 cup water
Beat the egg yolk until its frothy, add the oil then beat again. Add to the water. Massage into the scalp and throughout your hair. Rinse well.
Hair Conditioner One Recipe
Combine mashed avocado with some coconut milk. Comb it through the hair and let sit for 10 -15 minutes, rinse out.
Shampoo Recipe
In a blender, combine 1 ounce olive oil, 1 egg, 1 tablespoon lemon juice, and 1/2 teaspoon apple cider vinegar. Use as regular shampoo.
Remove Conditioner Buildup Recipe
(www.creativehomemaking.com)
Baking soda removes conditioner build-up from your hair. Rub in and rinse thoroughly, then shampoo with your regular shampoo.
Hair Conditioner Two Recipe
Mayonnaise is a great conditioner for dry hair.
Depending on the length of your hair, apply approximately 1/2 cup of mayonnaise to your dry hair. Work into hair really well and then cover your hair with a plastic bag, allowing to set for about 15 minutes. Rinse thoroughly and then shampoo as usual.
Avocado Facial Recipe
Avocado is a naturally rich moisturizer. Mash the meat of the avocado into a creamy texture. Massage into the face and neck . Leave on for 15 minutes and gently rinse off.
Facial Mask Recipe
Squeeze half a lemon and mix the juice with one beaten egg white. Leave on your face overnight or, for a quick pick-me-up, just 15 minutes. Splash warm water on your face to rinse.
It helps to removes blotches, because the lemon works as a bleaching agent.
Lighten Circles under Eyes Recipe
To lighten dark circles under your eyes, wrap a grated raw potato in cheesecloth and apply to eyelids for 15-20 minutes. Wipe off residue and apply an eye cream.
Egg & Honey Mask Recipe
Mix together 1 tablespoon honey, 1 egg yolk, 1/2 teaspoon almond oil and 1 tablespoon yogurt. Honey stimulates and smoothes, egg and almond oil penetrate and moisturize, and yogurt refines and tightens pores.
Egg, Avocado & Mud Facial Mask Recipe
Clay is available in powder form at any health food store. Mix 1 tablespoon dry clay with 1 egg yolk, 1/4 of a mashed avocado and enough witch hazel to create a smooth mixture. Mud dries excess sebum while the egg yolk and avocado replenish lost moisture. Witch hazel tones.
Egg & Olive Oil Hair Mask Recipe
Mix two whole eggs with four tablespoons of olive oil. Smooth through hair. Wrap head with plastic wrap, and leave in hair for 10 minutes. Rinse well.
Fruit Smoothie Hair Mask Recipe
Blend 1/2 a banana, 1/4 avocado, 1/4 cantaloupe, 1 tablespoon wheat germ oil and 1 tablespoon yogurt. For extra conditioning, squeeze in the contents of a vitamin E capsule. Leave in hair for 15 minutes.
Facial Exfoliater Recipe
2 heaped tsp fine oatmeal
1 tsp. baking soda
Combine ingredients, and add enough water to make a paste. Apply to skin and rub gently. Rinse and gently pat dry.
Banana Wrinkle Fighter Recipe
Banana is wonderful as an anti-wrinkle treatment. Mash 1/4 banana until very creamy. Spread all over face and leave for 15-20 minutes before rinsing off with warm water followed by a dash of cold. Gently pat dry.
Grape Cleanser Recipe
Grape juice makes an excellent cleanser for any skin type. Simply split one or two large grapes, remove pips and rub the flesh over face and neck. Rinse off with cool water.
Oily Skin Mask Recipe
Mix 1 tsp. brewer’s yeast with enough natural yogurt to make a thin mixture. Pat this thoroughly into all the oily areas and allow it to dry on the skin. After 15 - 20 minutes, rinse off with warm water, then cool water and blot dry.
Home Beauty Tips
Everyone wants to look their best and as beautiful as they can. Many of us spend a lot of money on branded beauty products and on numerous visits to the beauty parlor. There are a number of simple beauty treatments that we can use with things that are easily available in our homes. Here are a few home beauty tips that you can try using things from the kitchen without any extra cost.
- To remove puffiness from the eyelids, massage a drop of very fresh castor oil on to them.
- To cool your eyes, make eye pads using thick slices of cucumber. Another option is to use cotton pads soaked in cold milk. Lie down and place them on your closed eyes and relax for a while.
- Putting a drop of rose water into each eye just before you sleep can also refresh you eyes.
- To prevent your lips from chapping, use hot water fermentation on your lips and then apply a mixture of vaseline and honey. Apply this mixture about three times a week.
- To prevent your lips from drying you can use a ground mixture or rose petals and milk butter.
- To delay age spots on your hand, use a piece of lemon and rub all over your hand, before washing. This will delay onset of age-spots.
- If you have no time to shampoo your hair before going out, then brush 1 tablespoon of talcum powder or corn flour through your hair. Try this out first when you are not in hurry to make sure that it works the way you want.
- To prevent hair loss you should have a biotin rich drink. Blend bananas with honey, yogurt and low fat milk. Drink this for a few weeks.
- While blow drying and setting your hair, blow-dry at hot on the roots of the hair. Roll your hair inwards or outwards at the ends. To improve the setting make sure the ends are evenly rolled in or rolled out. Heat the hair for a second and then let it cool. This process of setting the hair will last longer and make your hair look beautiful.
- To condition your hair, after shampooing your hair take some conditioner on your palm and rub it with both hands. Apply from the hair shaft moving downwards. Do not apply on your scalp. Rinse your hair after 5 minutes.
- To add extra shine and glow to your hair add 2 tablespoons of malt vinegar. Use it as a last rinse and towel dry your hair.
Homemade Cleaners Window Cleaners, Carpet Shampoo, and Multipurpose Cleaners
For many of us, the thought of housecleaning conjures up the image of a huge array of cleaning products -- products with brand names and mysterious chemical ingredients. The average person has been so bombarded with advertisements for these products that he or she actually believes cleaning is impossible without them. We know of one woman who bought $38.32 worth of cleaning items alone on one trip to the supermarket. And for many of us, these expensive products end up lying half-empty, moldering in kitchen cabinets. But cleaning can be done without brand-name products, which are not only expensive but also can be dangerous your health.
Of the two million chemicals now in existence, only a few hundred have been tested adequately for their potential for causing cancer, liver or kidney damage, birth defects, and so on. Even when there is a known danger, many chemicals remain in use. Spot removers, for instance, contain either chlorinated hydrocarbons or petroleum distillates, and can be lethal even in small quantities.
Some 35,000 serious accidents occur each year with bleaches, dyes, waxes, polishes, and assorted cleaning compounds. More than a thousand children in the United States die each year from accidental poisoning, often from chemical compounds. Some swallow electric dishwasher detergent (the container may look like a cereal box), some drink furniture polish that resembles cherry soda. But these are the acute cases.
A clue to long-run effects of these chemicals is found in the recent study showing that housewives have a cancer rate double that of women working outside the home. Our houses contain many of the chemicals known to be cancer hazards in industry -- and many of these we use for cleaning.
However, we can reduce the number of dangerous chemicals in the home to a very few -- perhaps bleach, washing soda, and ammonia. We can keep these under lock and key, and use them sparingly. As for all the rest, the o-phenylphenols and isopropanols, we don't need them.
Here are some "grandmother-tested" ways to clean without dangerous chemicals, and save money, too.
Scouring powder: Combine nine parts whiting (from a hardware store) with one part soap granules. This mixture won't scratch surfaces as commercial products do, and it omits the unnecessary chlorine, which could accidentally combine with other chemicals -- like ammonia -- to produce dangerous chlorine gas.
Brass and copper cleaner: Vinegar and salt paste.
Window cleaner: 4 tablespoons ammonia, 2 tablespoons vinegar, and 1 quart water, followed by lots of elbow grease with crumpled old newspapers for a special sparkle.
Drain cleaner: First, try a plunger. Then try 1/2 cup washing soda followed by 2 cups boiling water. For a stronger treatment, combine a handful of baking soda with 1/2 cup vinegar. Close the drain and let it sit, then flush with water. Do this regularly to prevent buildup. (Washing soda is an alkali much less caustic than lye, but it should be kept locked up. It is dangerous.)
Rug cleaner: Get the spill scooped or blotted up fast! Dip a small brush in cold water and work out the spot. For a grease spot, sprinkle a generous amount of dry baking soda or dry cornstarch on the spot. Let it stand for an hour or so, then vacuum. If the grease remains, try the Magic Spray Cleaner below, and a stiff brush.
Rug shampoo mix: Mix 1/4 cup mild detergent or soap, with 1 pint of warm water and 2 tablespoons vinegar. Whip into a stiff foam. First, vacuum the rug thoroughly. Apply the foam and scrub. Let dry, then vacuum again.
Magic spray cleaner (for surfaces other than varnish, aluminum or asphalt tile): 1/4 cup ammonia, 1/8 cup vinegar, 1 tablespoon baking soda, and 1 quart water. Pour into glass or plastic bottle, screw on a hand squirter top, and enjoy.
Furniture polish: Use paste wax or mineral oil, which are much less toxic than petroleum distillates like "lemon oil," which isn't from lemons.
Spot remover: For fabrics that don't take to bleach, apply ammonia diluted with an equal amount of water. Put paper towels underneath to blot. If the ammonia odor clings, apply a table-salt solution. (A last resort for old stains is a dab of vinegar.)
Oven cleaner: Sprinkle spills generously with salt while the oven is still hot. The burned deposit should scrape off with no trouble when the oven cools. For thorough cleaning, set an open shallow dish of full-strength ammonia inside the cold oven. Close the door and let it stand overnight. The ammonia gas from the solution is absorbed by the grease, which ends up like soap. Do not use this method on aluminum.
Deodorizers: Use baking soda here, there, and everywhere -- down the drain, on baby spit-up, in diaper pails, refrigerators, cat litter and the kitchen sponge. It's easy and simple.
But now that you've cleaned the house, you're hungry. You eat, and then you have all those dirty dishes, rags, and the laundry, too. What to do about them? It's time to look at the great detergent/soap controversy.
Dishes done by hand come clean quite easily with soap powder. Greasy or burned residues can be soaked with soapy water and a dash of ammonia. Dish detergents aren't at all necessary unless you use an electric dishwasher, and then they are extremely dangerous. They are so caustic that a mouthful could be fatal to a small child.
Some folks think that electric dishwashers are necessary to reduce the number of germs on their dishes, but there are other ways to get them germ-free. The best approach is to wash and rinse them well in hot water, then let them dry by standing, covered with a towel. Do not dry them by hand.
It's clothes-washing that really sparks the soap-detergent controversy. Soaps don't dissolve as easily as detergents. And in hard water, soap combines with the water's calcium grains to make a hard "curd" on clothes and tub. But soaps can do as well as detergents, even in cold water, according to a study published in Consumer Research Magazine.
What's needed is to make sure the soap dissolves before you put the clothes in -- stirring helps. If you have hard water, add some washing soda. It will precipitate the calcium out of the water to prevent curd formation. (Other water-softening powders rely on huge quantities of phosphate.)
Remember that washing soda is dangerous, so keep it away from children. Bleach helps clean, and borax will "sweeten" the wash, but these may not be needed most of the time, and they, too, are toxic chemicals.
But why bother with soap? Are detergents really that bad? Actually, we know little of the possible harmful effects of detergent chemicals, either on people or on the natural environment. We do know that enzymes added to some detergents to "fight stains" can induce allergies. Detergents can cause asthma and skin irritation, and they have been shown to kill sperm in mice. They irritate if inhaled, and can be fatal if swallowed.
Besides, detergents generally cost 1/3 more per wash load than soap powder. The profit margin in detergents has been at least 25 percent greater than that on soaps, according to one government study.
Another point is that detergents usually rely on some phosphates to carry off dirt. Phosphates pollute our waterways, destroying lakes and rivers. Some detergents rely on other compounds, but often we do not know the long-term effects of these. NTA (nitrilotriacetic acid), for instance, was touted as the replacement for phosphates until it was found to cause birth defects and cancer.
One further argument against detergents is that they are made from petroleum, a nonrenewable resource. In contrast, soap is made from lye and fats or oils that are part of an ever-renewing natural cycle of life.
That's what cleaning is about, really -- renewing our environment so that life goes on happily and healthily. What use is a clean house, if it pollutes our bodies and the world around us? Cleaning with simple, natural ingredients can be a testimony of our dedication to an integrated, organic way of life.
"Out, Out, Damned Spot!"
I remember Lady Macbeth washing her hands endlessly, trying to get the bloodstains off. She was guilty. Spots and stains tend to bring on guilt feelings.
A little historical light on the subject may help. A friend of mine did a study on the American home as it was portrayed in magazines since the year 1900. She found that every new invention, like flush toilets or vacuum cleaners, inaugurated a new -- higher -- standard of cleanliness.
For instance, an advertisement for vacuum cleaners urged women to "put an end to dusty Friday," the day when they swept the floor and the rugs for the weekend. The standard of cleanliness was once-a-week sweeping. After the arrival of the vacuum, a higher standard developed -- cleaning floors and rugs two or three times a week.
The flush toilet, when invented, became not simply a way to avoid cold, wet journeys to the outhouse, but a new object that must be scrubbed, deodorized, and disinfected.
Detergents, invented in the 1930s, led to standards of clothes cleanliness in which even a tiny spot leads us to throw the whole garment in the wash, rather than sponging the spot and wearing the article one more day.
Cleanliness became next to Godliness -- a sign that people had "made it" into the middle class and could afford the new appliances and chemicals.
There was, however, a strange side-effect for women. The housewife's work may have been easier, but the hours were longer. A time study of rural urban housewives in 1930 showed almost no differences in hours -- 61.0 on the farm, 63.2 in towns and cities. By 1947, farm women still worked a 60-hour week, but women in cities (usually the owners of more labor-saving devices) were logging close to 80 hours per week.
The clue to this mystery comes from the Ladies Home Journal: American homes were becoming "more satisfying," and housekeeping standards were much higher.
So when we consider that spot or stain, we should remember that cleanliness is only one of many values which change from time to time. Is it more important to have perfectly clean clothes, or to end the chemical contamination of our waterways brought on by phosphates, enzymes, brighteners, and cancer-causing carbon tetrachloride?
If art gum erasers, soap-and-water, and elbow grease don't get all the smudges off the walls, is it better to leave them for the next paint job or to run for an aerosol-foam wall cleaner with expensive packaging, high advertising costs, and several chemicals that have not been tested for their long-term effect on humans? (My experience is that the commercial cleaners will not get all the smudges off anyway.)
Most of the time we may find ourselves saying that a little dirt never hurt anyone. It's a sign of life and growth. We may find ourselves buying the clothes and furnishings that accept soap and water, nature's own remedies for dirt. After all, nobody ever expected a garden to be dirt-free, and in cleaning our homes we are truly tending the garden of our lives.
Easy homemade soap

Mix in large pyrex measuring cup, stir with a chopstick saved from order-in Chinese food. Again, DO NOT BREATHE THE FUMES. WEAR GOGGLES.
700 ml purified water
270 g or 91/4 oz lye (one small container)
Oils –Mix in a big pot
Olive oil 955g 4.5 cups
Coconut oil 390g 500ml 2 cups
Grapeseed oil 515g 500ml 2 cups
Use the cheap pomace olive oil, virgin doesn’t work as well.
Let lye mixture cool to 110F. Warm oils to 110F. When both are at the same temperature, slowly pour lye mixture into oils. Mix with a stick blender until trace, periodically scraping sides and bottom of pan with a spatula. I mix with short pulses of the blender, and it only takes about three minutes.
The first time I made soap I used a whisk and my spatula, which I washed carefully later. Next time I used my Braun stick blender. Once I felt sure that I was going to make soap regularly, I bought a used stick blender at Value Village for $5.00 and dedicated it to soap making. If you use a whisk, you can look forward to hours of stirring. I also have a couple of thrift-shop thermometers, one for the lye and one for the oils. I have also heard of people making soap by feel. When the containers of lye and oils feel similarly warm to the touch, you are good to go.
At trace, add 10ml cinnamon oil. Mix as little as possible, just enough to combine. Theoretically, the soap can harden very quickly at this stage, trapping your spatula inside a giant bar. I have never had a problem with this recipe, though.
Pour into mould. Wrap with heavy blankets for 24 hours to keep the heat in and help the chemical reaction.
The next day, when soap has set, cut it into bars and store, separated nicely, on brown paper in cool place. Turn over after two weeks. Use after one month.
How to make your own homemade "pop tarts"

Ok, these are not pop-tarts exactly, how about just-like-pop-tarts-but-without-the-stuff-you-can't-spell (or say)? It's super easy, all you need is a good butter pie dough and delicious jam of your choice. And if you're one of those who think a great pie is all about a good crust--I am of course one--these pop-tarts are perfect for you. They are filled with just enough delectable jam to punctuate the flavor without obscuring the buttery, flaky goodness of the crust.
I've been having so much fun making them (and eating them) lately, I thought I'd share a few tricks I picked up along the way with you so your pop-tarts come out perfect every time. Like this one in the picture just below--a "pop-tart" filled with homemade Reine Claude plums and vanilla beans--which I polished off in three seconds flat right in front of Lulu's at the Octagon in Santa Cruz.

Start with the pie crust recipe you're most comfortable with. If you haven't got one, you can check out Pie Crust 101 over at Deb's Smitten Kitchen, or Shuna's very thorough post on pies, or even Ms.Martha herself.

Break off a piece about 75g by weight. Flour the pastry board or your counter top well.

Roll the dough into 8"x6" rectangle, working gently and slowly so you get a good rectangular shape.

Brush off excess flour. It's generally a good idea from this point on to place the dough sheet onto a piece of parchment paper so it can be moved pretty easily.

Pick your favorite jam from your cupboard and spread it generously on to one side of the dough, leaving about an inch margin on three sides. I like to use jams that are a little bit on the thicker side, as they tend to be more intense and can easily be pressed in between two sheets of dough.

Fold the dough in half, making sure they match the other edge perfectly. Press down along the edges to seal the dough pocket. If your dough had trouble sticking together, try dipping your fingertip into a bit of water and wipe it along the inside of the seam, then press the dough down again to seal.
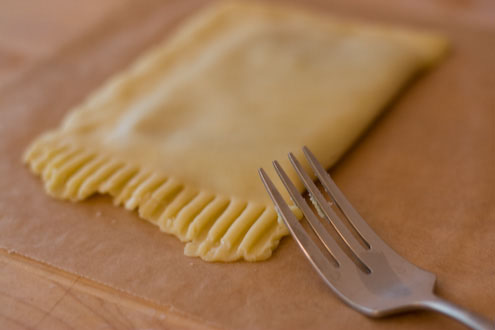
Take a fork and use the tines to press the dough together, creating a nice pattern around all the edges but the folding seam.

Trim off the excess, uneven dough edges. I use a pastry scraper, but you can easily use a kitchen knife.
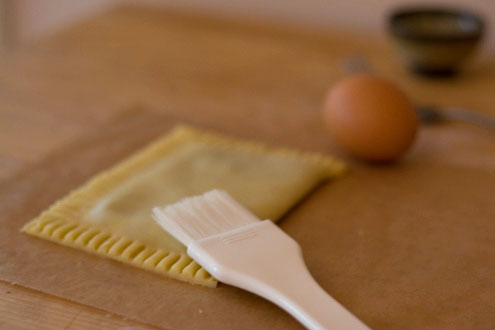
Brush the top with egg wash and sprinkle raw sugar over the top. Cut a few vents along the top of the pop-tarts.

Et voila! Bake in preheated 400F (about 200C) oven for 18-20 minutes, depending on the amount of sugar in the crust and many other factors. I'd recommend checking at the 15-min mark and continue to keep your eye on them, and take them out of the oven as soon as they are nicely golden brown and not too brown on the crimped edges.
HomeMade Paper

The press is on!
Bring the paper chase home to roost. Making your own paper is fun, easy, and a delightful project for the weekends. Note that this 2torial won't teach you to make printer-quality office paper (although you can recycle used office paper to make your own new paper)--it'll teach you to create pages of personalized pulp upon which to pen your powerful sentiments. Why? Homemade paper lends a distinctive personal touch to any project from greeting cards to a personal note or letter. And it's much easier than it sounds once you draw off a page or two.
Historically, the best papers in Europe were first made from a processed sheep, goat, or calf skin. Other parts of the world used woven vegetable fibers pounded together: the Egyptians used papyrus, a long coarse grass; and the cultures of China and Japan are known even today for producing very fine rice papers, made from the rice leaves or shoots. When the development of the printing press created a demand for paper, Europeans used old rags and recycled clothing, and eventually wood pulp from trees.
Most paper products today, from newspapers to packing boxes, is made from wood pulp, a poor-quality fiber requiring glues and bleaches to be added. These additives, called sizing, account for the yellowing effect you see in old newspaper clippings.
The quality of paper is largely based on the fibers used. Look around your home for attractive scraps you've been saving. Many different colors can be mixed, but bear in mind what the paper will be used for. Keep the colors relatively uniform and light in hue if it'll be used for writing. A small amount of glossy, bright paper can be added to otherwise bland fibers to give a speckled effect.
Use scrap paper which contains a minimum of writing and printed ink on it. These could tint the paper unevenly, or worse, an unintended memo from the past could find its way back to the surface.
 Find the fibers
The paper that you'll make is essentially a mesh of plant fibers pressed together to make a strong flat surface. The ingredients you choose will determine the look and quality of the paper.
- Gather enough fiber to create a few sheets of paper. This need only be a cupful (1/4 liter) of paper scraps, loosely packed, per standard sheet. It's good to have extra raw material on hand in order to experiment with thickness and quality. Expect to lose the equivalent of a page or two of material in the process.

- Use old paper that has interesting texture. Tear a piece of it-- does it rip cleanly or leave a jagged edge? The harder to tear, the longer the fibers are in the paper. Long fibers create strong paper. Short fibers create smooth texture. Interesting yet durable paper balances these two ingredients.
- Optional: Lint from clothes-dryer lint trap is ideal paper fodder. Small flowers and leaves, bits of foil (from leftover holiday paper and champagne bottles) and colored threads also add a special touch. Grab anything you can shred and that floats. But use these specialty items sparingly, otherwise the page won't hold together.
Once you've gathered enough scraps to make paper, tear them up into pieces about 1 inch (2 cm) square. If you're using different kinds of paper it's a good idea to separate them into different piles.

- Thread, metallic foils, and other small decorations should be cut to length using a pair of scissors. Be creative--vary the sizes from 1/8 inch to two inches (30mm to two cm). A few long threads are interesting;too many and it looks like spaghetti. Foils and bright colors are better in small pieces less than 1/4 inch (5mm) across. Set any of these decorative fibers aside for now. Don't shred these in the blender.
Sort your scraps by fiber length and color, and identify the base color: the pile of scraps that most resembles the color you want the paper to be.
 Cut the screen

Ordinary window screen works great for making paper. It should be free of dents and curves, otherwise the paper will come out in exactly the same shape. Rust-free wire screen works the best. Synthetic screen should be used with caution; it's less rigid, which can cause problems later in the process. Synthetic screen may be serviceable if used with a frame, as described below.
- Cut the screen the same size as the sheets you want to make, slightly large if you want to make a frame for the screen. If you intend on making lots of paper the same size you should consider building a frame around your screen. In this case allow two extra inches in each direction before cutting the screen. For example, if you want to make a frame for 8 by 10 inch paper, then cut a screen 10 by 12 inches large.
Optional: Build a frame using lengths of wood 1/2 inch wide by one inch thick, or one inch square. You don't have to get fancy, just be sure that the inside of the frame is the same size as the paper you want to make, the corners are square, and not too wobbly. Set your screen down on top of the frame evenly and nail or staple it in place. You want the screen attached snugly to the frame, without any big gaps between the wood and the screen.
 Blend it to bits
And now a dash of paper theory--in order to make new paper from old paper, you've got to change it to a mushier state. Blenders accomplish this nicely, and the result is the pulp.
- Fill a blender about 3/4 full with clean water. Take a handful of scraps from your base color pile and put them into the blender. Cover the top and blend on medium-high for a few seconds. The water will start to look like very watery oatmeal.
- Add various scraps one by one, and give a short blast with the blender each time. You want to put shorter fibers in first, then gradually add scraps of longer fibers. Otherwise all the fibers will end up about the same length--short!
- Add any special items (including threads) last. Don't turn the blender on at this point as it may ruin these items or wreck the blender, or do both.
Don't make a pulp more than one part scraps to four parts water--ie, don't fill the blender more than 3/4 full. If you're making large volumes, pour out the finished pulp mix and start again.
Hit the tub!

In this step you'll use a tub of water to put the pulp into a watery suspension. This will ensure a even distribution of pulp onto the screen. Note: you'll make one sheet at a time. This way you can adjust the sizing or pulp-to-water ratio, as you see how each sheet comes out. You may want to test the screen with a little pulp, to check that the water can run through the screen while retaining the pulp.
- Fill a large tub with clean water. Pour the pulp (the fiber and water mixture) into the tub. Swirl it around. The pulp should be distributed evenly throughout the water before you start dipping. If the mixture sits for a while before you're ready, some settling will occur. Just give it another swirl with your hands when ready.
- If you're using large amounts of lint or vegetable parts (including wood-pulp paper), add a few drops of white glue to the tub and mix it in thoroughly. Subtitute a tablespoon of cornstarch if you don't have any glue handy. This sticky, binding substance is called sizing.
- Hold the screen with the frame on top. Dip it in the tub at an angle until it's fully immersed, then move the screen back and forth until the pulp is evenly dispersed in the water and across the surface of the screen. Finish by pulling the frame straight up out of the tub.
- You should have collected enough pulp on the frame to make one sheet of paper--the pulp should fill the screen to the inner edges of the frame. The water from the tub will run through the screen, depositing the pulp on the top level of the screen. Hold the frame above the tub until only a few drops of water remain on the screen.
- If the paper looks too thin, add more pulp to the water in the tub, swirl, and dip the screen again. Too thick? Remove some pulp from the tub, dip the screen and collect a screenful of pulp. You can then remove the pulp from the screen by rolling it off with your fingers.
- No frame? If you're not using a frame, hold the screen about four inches below the surface of the tub. Agitate the water by moving the screen back and forth until the pulp is evenly dispersed in the water and across the surface of the screen. Draw the screen slowly and evenly up out of the tub. Hold the screen above the tub and allow the water to drain. Take care to keep the screen taut, or the pulp may "puddle" in the middle, which will produce lumpy paper.

There are actually two actions happening here: the force applied by the roller squeezes out the water from the paper, and absorbent materials above and beneath the paper prevent the paper from reabsorbing the water.
- Lay one sheet of wool felt down on a flat tabletop. Wool felt is ideal because water runs right through it and it's strong enough to sustain the pressure. The felt must be larger than the sheet you're making. Several felts, or a stack of old newspapers or even towels can be placed underneath the felt to help absorb water.
- Turn the frame over on top of the felt. The freshly drawn pulp should drop out easily. If it sticks, then gently tap the frame onto the felt.
- Lay another felt on top of the pulp. Cover with another sheet felt (or newspapers or towels).
- Take a rolling pin and press down on the pile to squeeze out the extra water. This will also bind the pulp fibers together. Start at one end and roll firmly and evenly across the pile. Do this several times to get as much water out as possible and to press the fibers together.
- The hand press option: a small hand press is great for squeezing out the paper. Turn the paper out on a large sheet of wool felt and cover with another sheet of felt as described before. Now squeeze the felt sandwich with the press. Or using the old-fashioned washing machine, feed the felt sandwich through the rollers.
Now carefully remove the top layer of felt (and any other absorbent materials) from the pulp. It should now hold together as an honest-to-goodness sheet of paper.
- Carefully take up two corners of the paper by rolling them back (just a half inch/one cm or so) with your fingers. Hold a corner with each hand and gently peel the sheet off the bottom felt.
- Clip the fresh sheet on to a laundry line with ordinary clothespins to dry. Any place that's warm and dry will be fine--wherever you would hang laundry. Avoid damp areas (mold might grow on the paper), dusty areas (wet paper will collect any dust in the air), or windy places (your paper could be blown off the line!)
Drying time is about three hours, more if the air is humid or if there is little sun.
Homemade Yoghurt

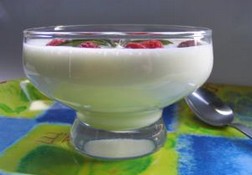
Yogurt takes a little bit of time to make. Not actual working time but time for it to sit and culture. Yogurt is a cultured product, much like cheese. It is a very easy and economical to make.
Before you begin there are a few things to make sure you have on hand and a few things to know and understand about the process. Most of what you need you will be able to find in the grocery store.
You need to begin with starter yogurt. Starter yogurt is yogurt that has been made with active live cultures; this is the friendly bacteria that will turn your milk into yogurt. You can buy a small container of yogurt at the grocery to use for this purpose. Make sure that the container says Made with live cultures or something of this nature. You want to buy plain yogurt, not flavored. Each time you make yogurt you will need some starter. You can use your own starter, but over time it looses its potency and your yogurt will not turn out. So I always begin with store bought yogurt. You can freeze your starter yogurt in ice cube trays so that it is convenient to have on hand.
As far as tools for making yogurt go, you will need a thermometer. A candy thermometer bought from the grocery store will work just fine. You will need a large pot to heat up your milk and then something to incubate your yogurt for about 12 hours. The temperature of the yogurt must stay between 90 and 110 degrees during this incubation time.
There are a variety of ways of maintaining this temperature. If you have a gas stove, putting your yogurt in the stove and leaving the pilot light on may be enough. Make sure you have a thermometer in the oven so you can keep an eye on the temperatures. If you have a stove that you can set at around 100 degrees, this works also. Another method that works is to use a small styrofoam ice chest. While you are making the yogurt fill up the ice chest with hot tap water. Right before you set the jars in the ice chest empty the water, place filled jars in the ice chest, and fill with 110 degree water up to the bottom edge of the lids. Put the cover on and place a blanket over this. After about 4 hours check to make sure the water is still the right temperature (between 90-110 degrees). If the water is cooling down, dump half of it out and replace with 110 degree water and cover again. Check every 1 1/2 hours or so to make sure the water is staying warm. If the temperature of your yogurt gets to high or to low then it will kill the culture. So it is important that during the incubation period that your temperature stays between 90 and 110 degrees.
 Homemade Yoghurtby Crystal Miller - 8 cups milk, cow or goat (I raise Nubian goats and use my own goat milk most often, but have made lots of yogurt with ordinary milk from the store) - 1/3 cup powdered milk (this is optional but will make a thicker yogurt) - 1/4 cup pure maple syrup, optional for sweetened yogurt - 1/2 cup starter yogurt Before you begin wash 2 quart-sized canning jars. If you want to use 4 pint-sized jars instead that would be fine too. Have the metal rings and lids ready to cover the jars when you are done. Pour your milk into a large cooking pot. Heat the milk up to 185 degrees. Allow the milk to cool down to 110 degrees. The cooling can take a long time. If you want to speed the process up fill your sink with cold water and place the pot of hot milk in the water and stir and stir. The temperature drops fairly quickly this way, so make sure to have your thermometer handy to keep checking. After you reach 110 degrees add the remaining ingredients and stir until everything is dissolved very well. Pour this mixture into your ready and waiting jars. Put the lids on and put them into what ever place you are planning to incubate and culture them. Leave them there for 10 to 12 hours. Try not to disturb the jars to much. When the yogurt is firm it is time to remove them and put them in the refrigerator to get nice and cold. Usually 12 to 24 hours. If you make and incubate the yogurt during the day it can refrigerate overnight and be ready for breakfast the next day. If you would like flavored yogurt, just add fresh cut up fruit or a little bit of flavored jam when you are serving your yogurt. |  Yogurt (oven style)Alternative method of yogurt making Makes 1/2 gallon 1/2 gallon milk (I use fat free) 2 cups instant dry milk powder 1 cup sugar or your choice of sweetener 1 Tablespoon good vanilla (I use Mexican) 1 6-8 oz. container yogurt with active cultures (first batch after that save some of your own) Thermometer Large, heavy, pot Electric stove with light or gas stove with non-auto pilot light. Can also use a heating pad/towel/and box to cover) Place milk in pot and add dry milk powder. Stir well. Heat milk to 180 degrees, stirring now and then so bottom doesn't burn Fill sink with ice cold water and place pot insde sink, Add sugar and stir well. Cool down to 110-115 degrees. Add vanilla. Add yogurt and stir well. Fill containers of your choice and seal. ( I use jelly canning jars) Place on cookie sheet or heat proof tray. Heat oven to 110-115 and turn off. Turn on oven light. Place yogurt in oven on upper rack and check oven periodically to make sure it stays between 110-115. Yogurt will be "done" in 4-6 hours but you can let it incubate for up to 12 depending on how tart you like it and how much beneficial bacteria you wish it to have. Serve plain or with any kind of fruit. Suggestions: Top with sliced bananas, peach or cherry pie filling, or stir in plain vanilla. |
Homemade Beauty Recipes for Bath & Body
Making your own homemade beauty products is much easier than you'd think. The recipes that you find on this site are easy to follow along and use mostly common household products.
You will find ideas on how to make everything from lip-gloss to foot soaks. We encourage you to turn your home into your own beauty spa and give these recipes a try. Not only is it much cheaper than purchasing products in the store or making an appointment at your local day spa, you also know exactly what ingredients you are putting on your skin.
The beauty products made with these recipes are made to order, as you need them. So they are always fresh and don’t contain any preservatives or other chemicals.
Make a little time for yourself this week and pamper yourself with one or more of these beauty recipes.
Homemade Plastic
This is a quick and simple method for making your own general-purpose plastic. The constituent ingredients are milk and vinegar. That's it. The total cost is less than $10, possibly less than $5 if you can get a good deal.
The plastic is moldable, and has a consistency of soggy cheese (I certainly hope I never encounter cheese that's anything like this!). When all is said and done, it should take you about 10-15 minutes to make the plastic (less if you make a small amount), 10 minutes of cleanup, plus 2+ days to allow the plastic to dry. As always, your milage may vary.
As for the final product's strength and whatnot, I would classify it as "okay." If you roll it thin (as I did in this instructable), it can easily be snapped in half, though it will probably survive a small drop on to carpet. Thicker pieces seem to be more resilient against average abuses - no problem dropping on to carpet, and if it's thick enough, you wouldn't be able to snap it in half. A blow from a hammer or other such object would quickly shatter it, though.
All in all, I would say this is mostly useful for folks looking for a fast and dirt cheap alternative to much better products available to the average joe. It's definitely not for something that will be handled on a daily basis - good enough for light decor, not much else.
This is my first Instructable, so bear with. Constructive criticism is always welcome!
The plastic is moldable, and has a consistency of soggy cheese (I certainly hope I never encounter cheese that's anything like this!). When all is said and done, it should take you about 10-15 minutes to make the plastic (less if you make a small amount), 10 minutes of cleanup, plus 2+ days to allow the plastic to dry. As always, your milage may vary.
As for the final product's strength and whatnot, I would classify it as "okay." If you roll it thin (as I did in this instructable), it can easily be snapped in half, though it will probably survive a small drop on to carpet. Thicker pieces seem to be more resilient against average abuses - no problem dropping on to carpet, and if it's thick enough, you wouldn't be able to snap it in half. A blow from a hammer or other such object would quickly shatter it, though.
All in all, I would say this is mostly useful for folks looking for a fast and dirt cheap alternative to much better products available to the average joe. It's definitely not for something that will be handled on a daily basis - good enough for light decor, not much else.
This is my first Instructable, so bear with. Constructive criticism is always welcome!

| To View All Steps on one page, Go Pro Today! |
 step 1Ingredients & Utensils
This doesn't require anything fancy. Essential Items: Milk Vinegar Large Pot Larger Pot (needs to be the same size as the other, or larger). Spoon, preferably plastic or metal Strainer or Colander, the finer the better Stove or other item with which to simmer milk. Paper Towels, lots and lots of paper towels Handy, but not necessarily essential, items: Wax Paper (go…
 step 2Heat it up
If you've never heated milk before, it's important to know that if you heat it too fast, it will start to burn on the bottom of the pot. To bring it to a simmer, it's best to keep the heat down to about 50-60%. I don't follow my own advice, and use full heat, because I don't want to wait. While the milk is heating, be sure to stir it occasionally, so it doesn't burn…
 step 3Strain
Slowly pour the heated liquid through the colander and into the larger pot. Most of the chunks of casein will get caught. We pour slowly to avoid splashing the plastic-loaded liquid into the sink. Something tells me that chunks of this stuff in the drain is not a Good Thing(tm). Once you've poured it out (don't worry about what's left in the bottom, we'll get to that)…
 step 4Sop up the excess
After you've strained all of the casein out of the liquid, you'll want to soak up some of the remaining juice in the mass on the wax paper. Use a few paper towels, and press gently on the casein. The liquid will spill out like squeezing a sponge. Be careful not to make it too dry, because it will become difficult to mold if it's too dry.
 step 5Mold!
At this point, you're ready to do whatever you want with the plastic. It will take about two days to cure, but if you're using a mold where it cannot easily breathe, it will take longer. One thing to watch out for is that the casein will warp when it's drying, especially if you have it rolled out into a sheet. It's best to put a weight on it.
Why Make Homemade Items
O've always liked to make gadgets and gizmos that fill some need ... some useful (or not so useful) function. It started with the simple things that many kids make - slingshots, a simple bow and arrow, a toy boat. Occasionally more involved items such as a canoe and a dune buggy became trophies to add to my accomplishments.
Simple things appeal to me more than more costly homemade items. A project with a small amount of time invested seems more like entertainment. Projects that use up more time and money make me think I would be better off doing something else.
So now when I don't feel motivated to do more practical things I often turn to an idea about some device or other that I've wanted to try making but never got around to.
I can recall many such improvised devices that gave me much needed diversion from the grind of more practical endeavors. Time spent earnestly involved in the creation of something designed and made with ones own ingenuity can be quite enjoyable. Each project gives me something to be proud of and more evidence that I am capable of more than tediously repeating over and over what I have done too many times before.
Ideas for things to make come from many places. Most often the idea comes from some need. I do a lot of keying of text using a computer keyboard. I tend to keep the room temperature a bit cool, cool enough that my hands become uncomfortable. I ended up rigging a length of electrical heating tape wound in a large coil-shape to surround the keyboard. Tying the heat tape to a large piece of cardboard keeps it in place. It does a nice job of keeping my hands warm. I can leave the room temperature set where I want it. As far as I know, you can't buy anything like that.
A project can inspire wonder about the physical world and wonder about our abilities to manipulate what is around us. Our capacity to wonder and appreciate increases as we build and invent. Creation of an improvised device adds to awareness and reverence for what the world has to offer.
As we build and invent, we add to our awareness of what is around us. We begin to understand that even simple things are complex. This insight gives us appreciation for the physical world and our abilities to manipulate what is around us.
Creative and rational abilities are used together to design and make a homemade gizmo. The more often the two abililities are used together, the more powerful the combination becomes. A strong partnership of the rational and creative minds increases a person's ability to produce and enjoy life.
It is fun and satisfying to conjure up and build simple devices. Those created items command more appreciation than more casually acquired, purchased items. And it feels good proving that imagination and ingenuity can make life better. Having witnessed first-hand the process of invention, we wonder what other things we can achieve.
Simple things appeal to me more than more costly homemade items. A project with a small amount of time invested seems more like entertainment. Projects that use up more time and money make me think I would be better off doing something else.
So now when I don't feel motivated to do more practical things I often turn to an idea about some device or other that I've wanted to try making but never got around to.
I can recall many such improvised devices that gave me much needed diversion from the grind of more practical endeavors. Time spent earnestly involved in the creation of something designed and made with ones own ingenuity can be quite enjoyable. Each project gives me something to be proud of and more evidence that I am capable of more than tediously repeating over and over what I have done too many times before.
Ideas for things to make come from many places. Most often the idea comes from some need. I do a lot of keying of text using a computer keyboard. I tend to keep the room temperature a bit cool, cool enough that my hands become uncomfortable. I ended up rigging a length of electrical heating tape wound in a large coil-shape to surround the keyboard. Tying the heat tape to a large piece of cardboard keeps it in place. It does a nice job of keeping my hands warm. I can leave the room temperature set where I want it. As far as I know, you can't buy anything like that.
A project can inspire wonder about the physical world and wonder about our abilities to manipulate what is around us. Our capacity to wonder and appreciate increases as we build and invent. Creation of an improvised device adds to awareness and reverence for what the world has to offer.
As we build and invent, we add to our awareness of what is around us. We begin to understand that even simple things are complex. This insight gives us appreciation for the physical world and our abilities to manipulate what is around us.
Creative and rational abilities are used together to design and make a homemade gizmo. The more often the two abililities are used together, the more powerful the combination becomes. A strong partnership of the rational and creative minds increases a person's ability to produce and enjoy life.
It is fun and satisfying to conjure up and build simple devices. Those created items command more appreciation than more casually acquired, purchased items. And it feels good proving that imagination and ingenuity can make life better. Having witnessed first-hand the process of invention, we wonder what other things we can achieve.
How to Embed Items into Homemade Soap
Making soap for Christmas can be a creative endeavor. You can embed objects in your soaps to make them really special. Embedded soaps look like a million bucks, but this gift fits even a small budget. You can really let your creativity go wild with this if you know the criteria for choosing appropriate items.
Use your head when thinking of objects to embed. Avoid the following characteristics when choosing an embedment:
A sharp item that may cut your skin, such as glass
An item that can irritate your skin, such as certain poisonous plants
An item that doesn’t hold up to water, such as a dyed, fake flower
Some good items to embed include rubber bath toys ¯ the yellow rubber ducky featured in a clear translucent bar of soap is a classic ¯ and dried herbs. If you don’t mind if they get wet and you have another copy, you can even embed photographs.
After you decide what you want to embed, make sure that you choose a mold deep enough to accommodate your embedment.
Think about colors when you embed your soap. If your soap is dark, you won’t be able to see what’s inside.
To place an embedment in your melt-and-pour soap:
Melt your soap base.
Add your color and then scent; stir well.
Pour a thin layer of soap into your mold.
If your embedment is small, you may need to pour more soap to raise your item to the center position of the finished bar.
4After the soap starts to set, position your embedment.
Wait a few minutes and then add the remaining soap.
Remove your finished soap from the mold after it solidifies.
If you’re not going to use your soap right away, wrap it in plastic to store.
You don’t have to totally embed an item in your soap. For example, you can partially embed a rubber fish in a blue soap so that it appears to be leaping out of the ocean.
Subscribe to:
Posts (Atom)